
· How To · 5 min read
Commenting is Now Available Thanks to Giscus

For awhile now I have been wanting to add comments to my blog so that I can interact with my visitors and give people a way to reach out to me. I have explored multiple options. I could build my own. I could use Disqus. Or use a variety of other services.
My requirements for a comment system are that its affordable (or free), ad free, easy to implement, low impact on browser resources, easy for visitors to use, and easy to maintain. Disqus has a free level, but that has ads in it. I could build my own but I don’t have a ton of time for it and I am a fan of buying over building (instead of reinventing the wheel).
Recently, I have discovered Giscus. A Github-based commenting system for your website that is 100% free. For your site visitors, all it requires for use is a Github account. As a programmer and someone that writes programming-related articles this fits very well with my intended audience. And it is very easy to implement.
How to Setup Giscus
To setup Giscus you will need a few things first.
- Setup a “public” Github repository.
- Add the Giscus app to your repository.
- And have the “Discussions” feature enabled on your repository.
- Configure Giscus on their website Giscus.app.
- Add the JavaScript and placeholder HTML element to your website pages you want comments on.
- Finally, style the placeholder on your site.
Installing Giscus on Your Github
To setup your repository, I am going to assume you already know how to create a new repository on Github. Just don’t forget to set it to “public” instead of “private”. I recommend using a naming convention that helps identify the website. In my case, I called mine “patrickthurmond-comments”.
Once your repository is created, follow this link to the Giscus app on Github to add it to your profile.
Follow the link: https://github.com/apps/giscus. Next, click “Install”.
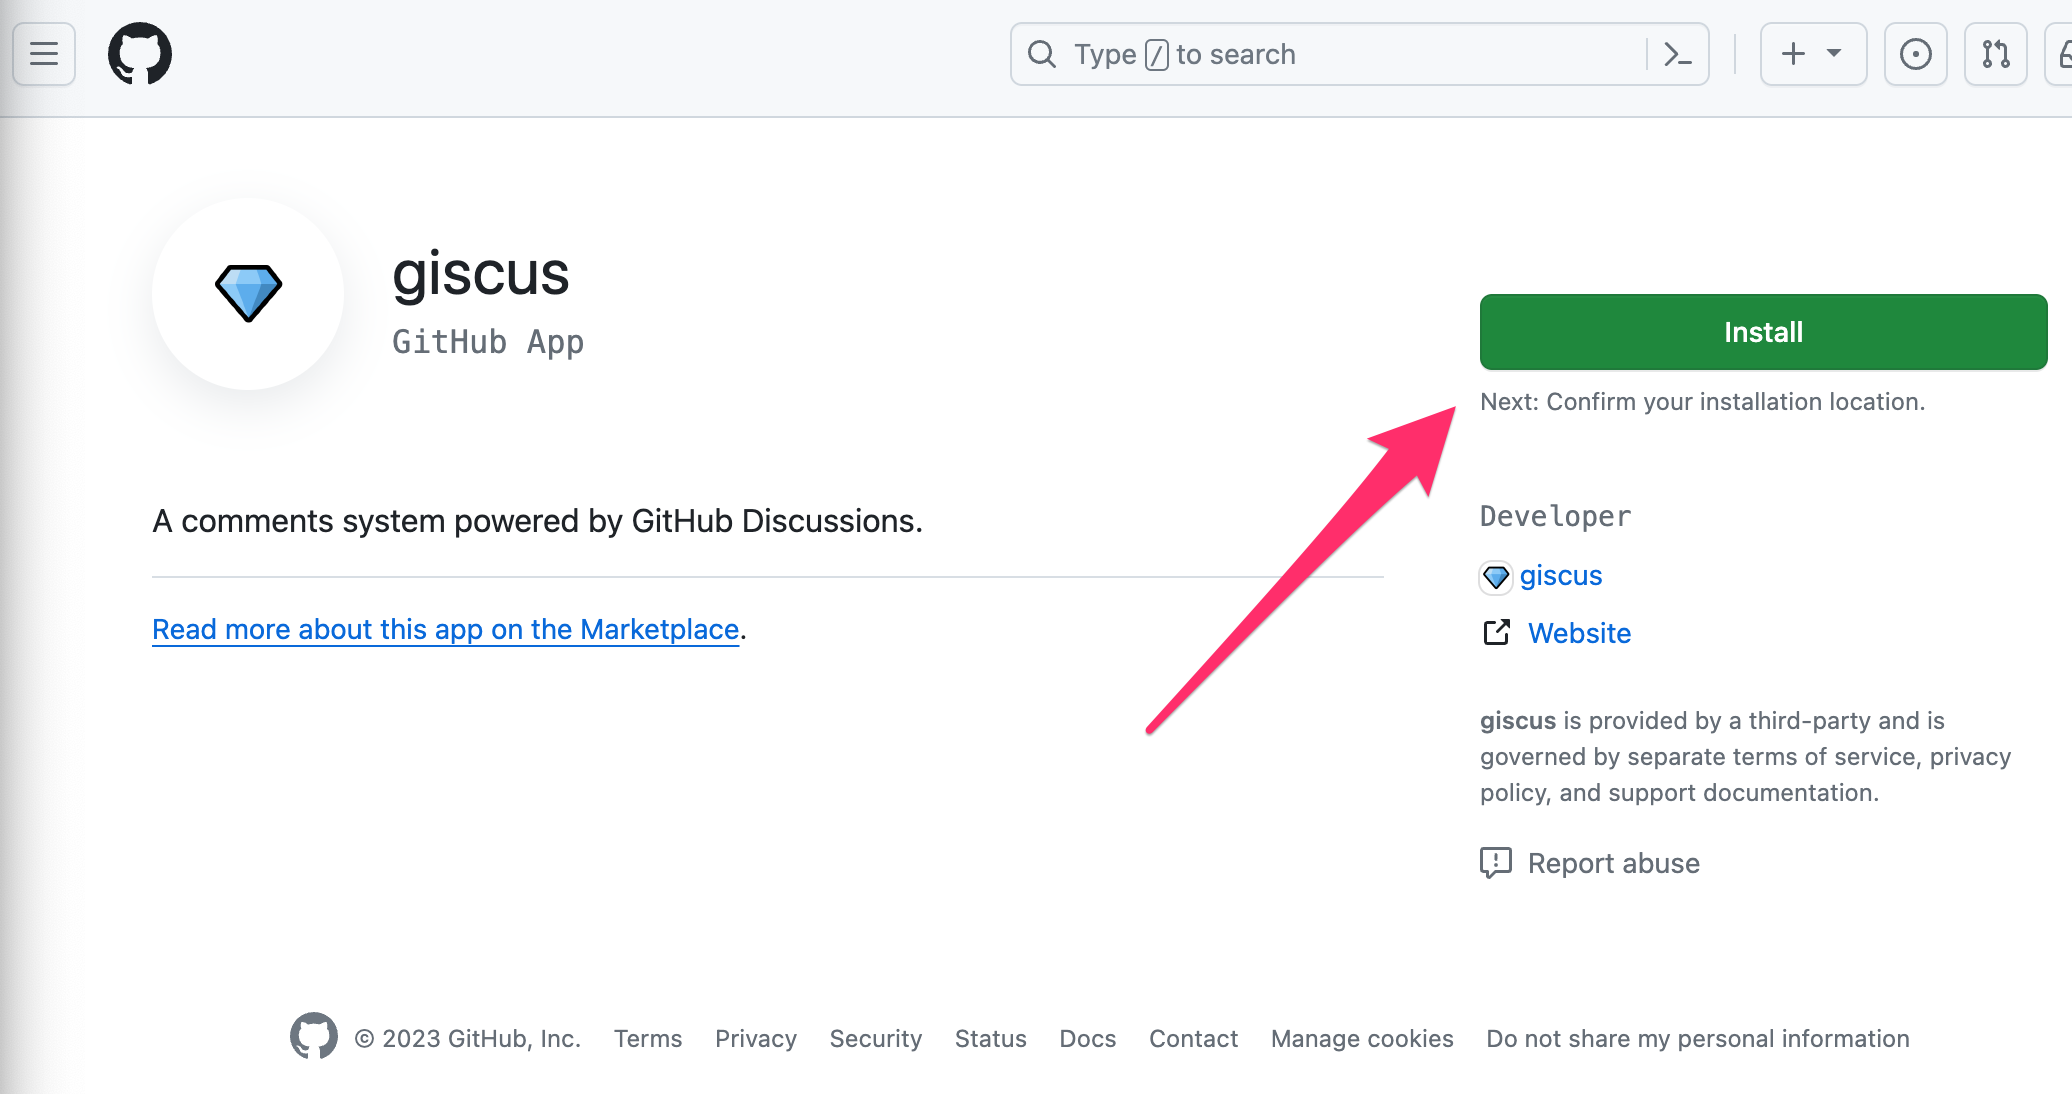
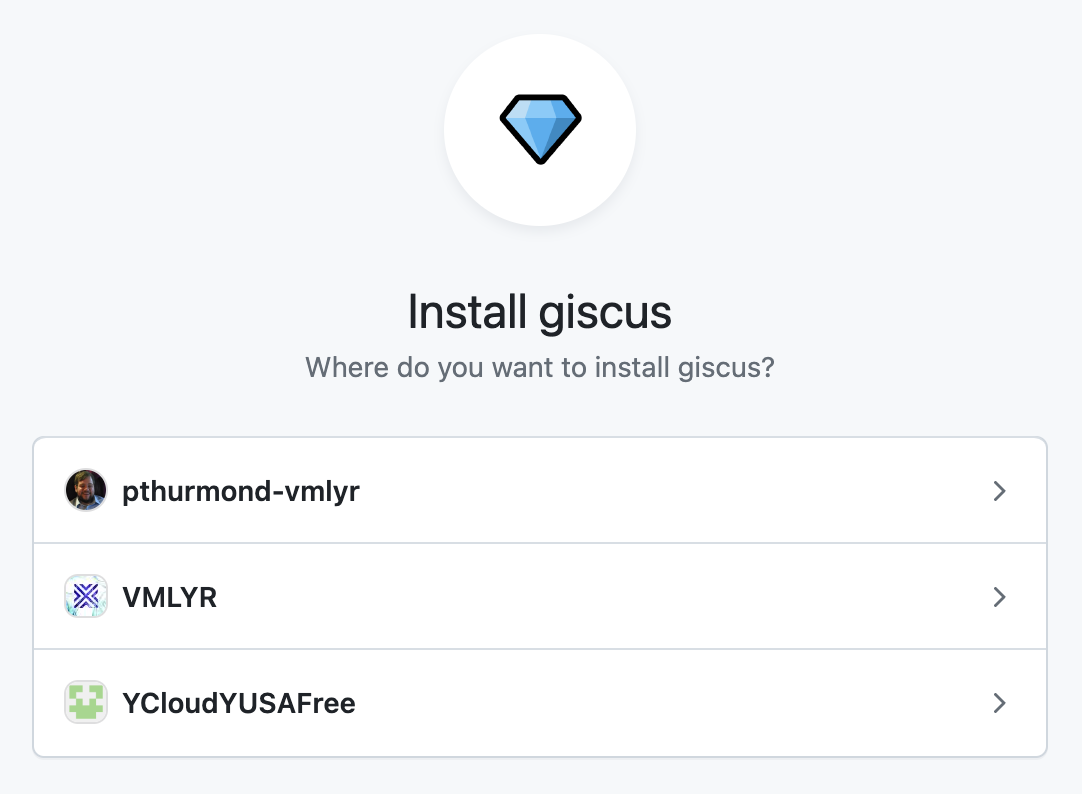
Tell it where you want to install it: Your Account or your Organization (if you have one).
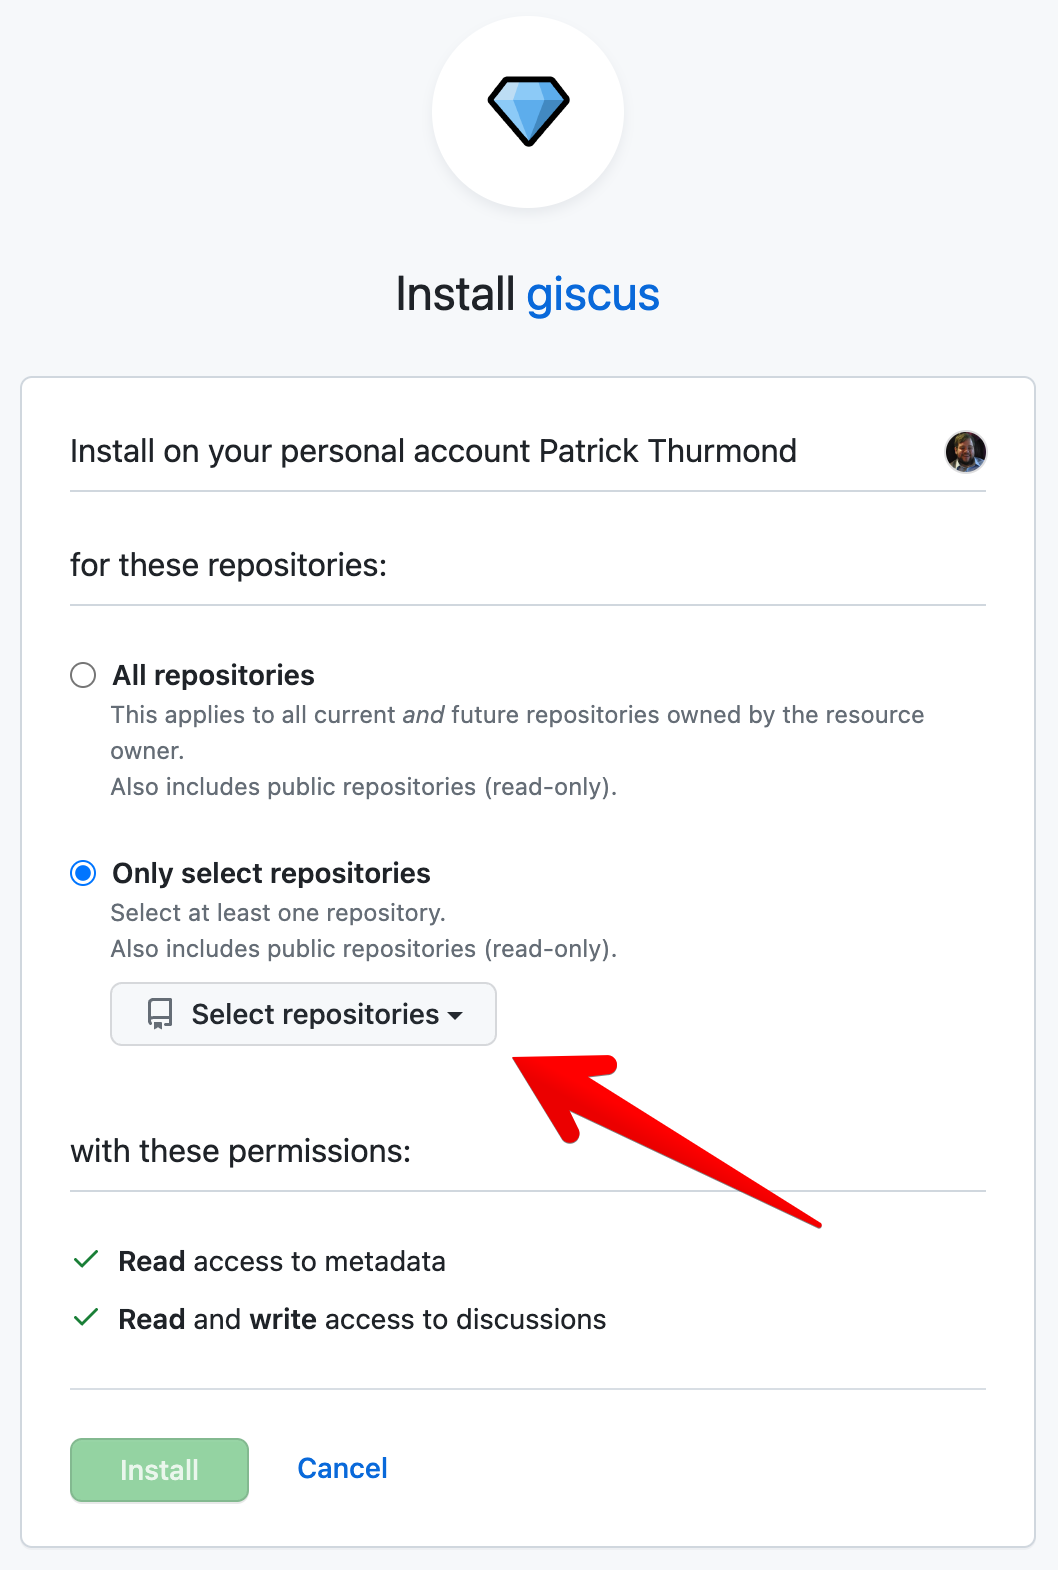
Then tell it whether you want it to be enabled for all repositories or only for specific repositories. I highly recommend selecting only specific repositories to limit potential impact if any concerns ever arise. Once selected then click on “Install”.
Preparing Your Repository for Giscus
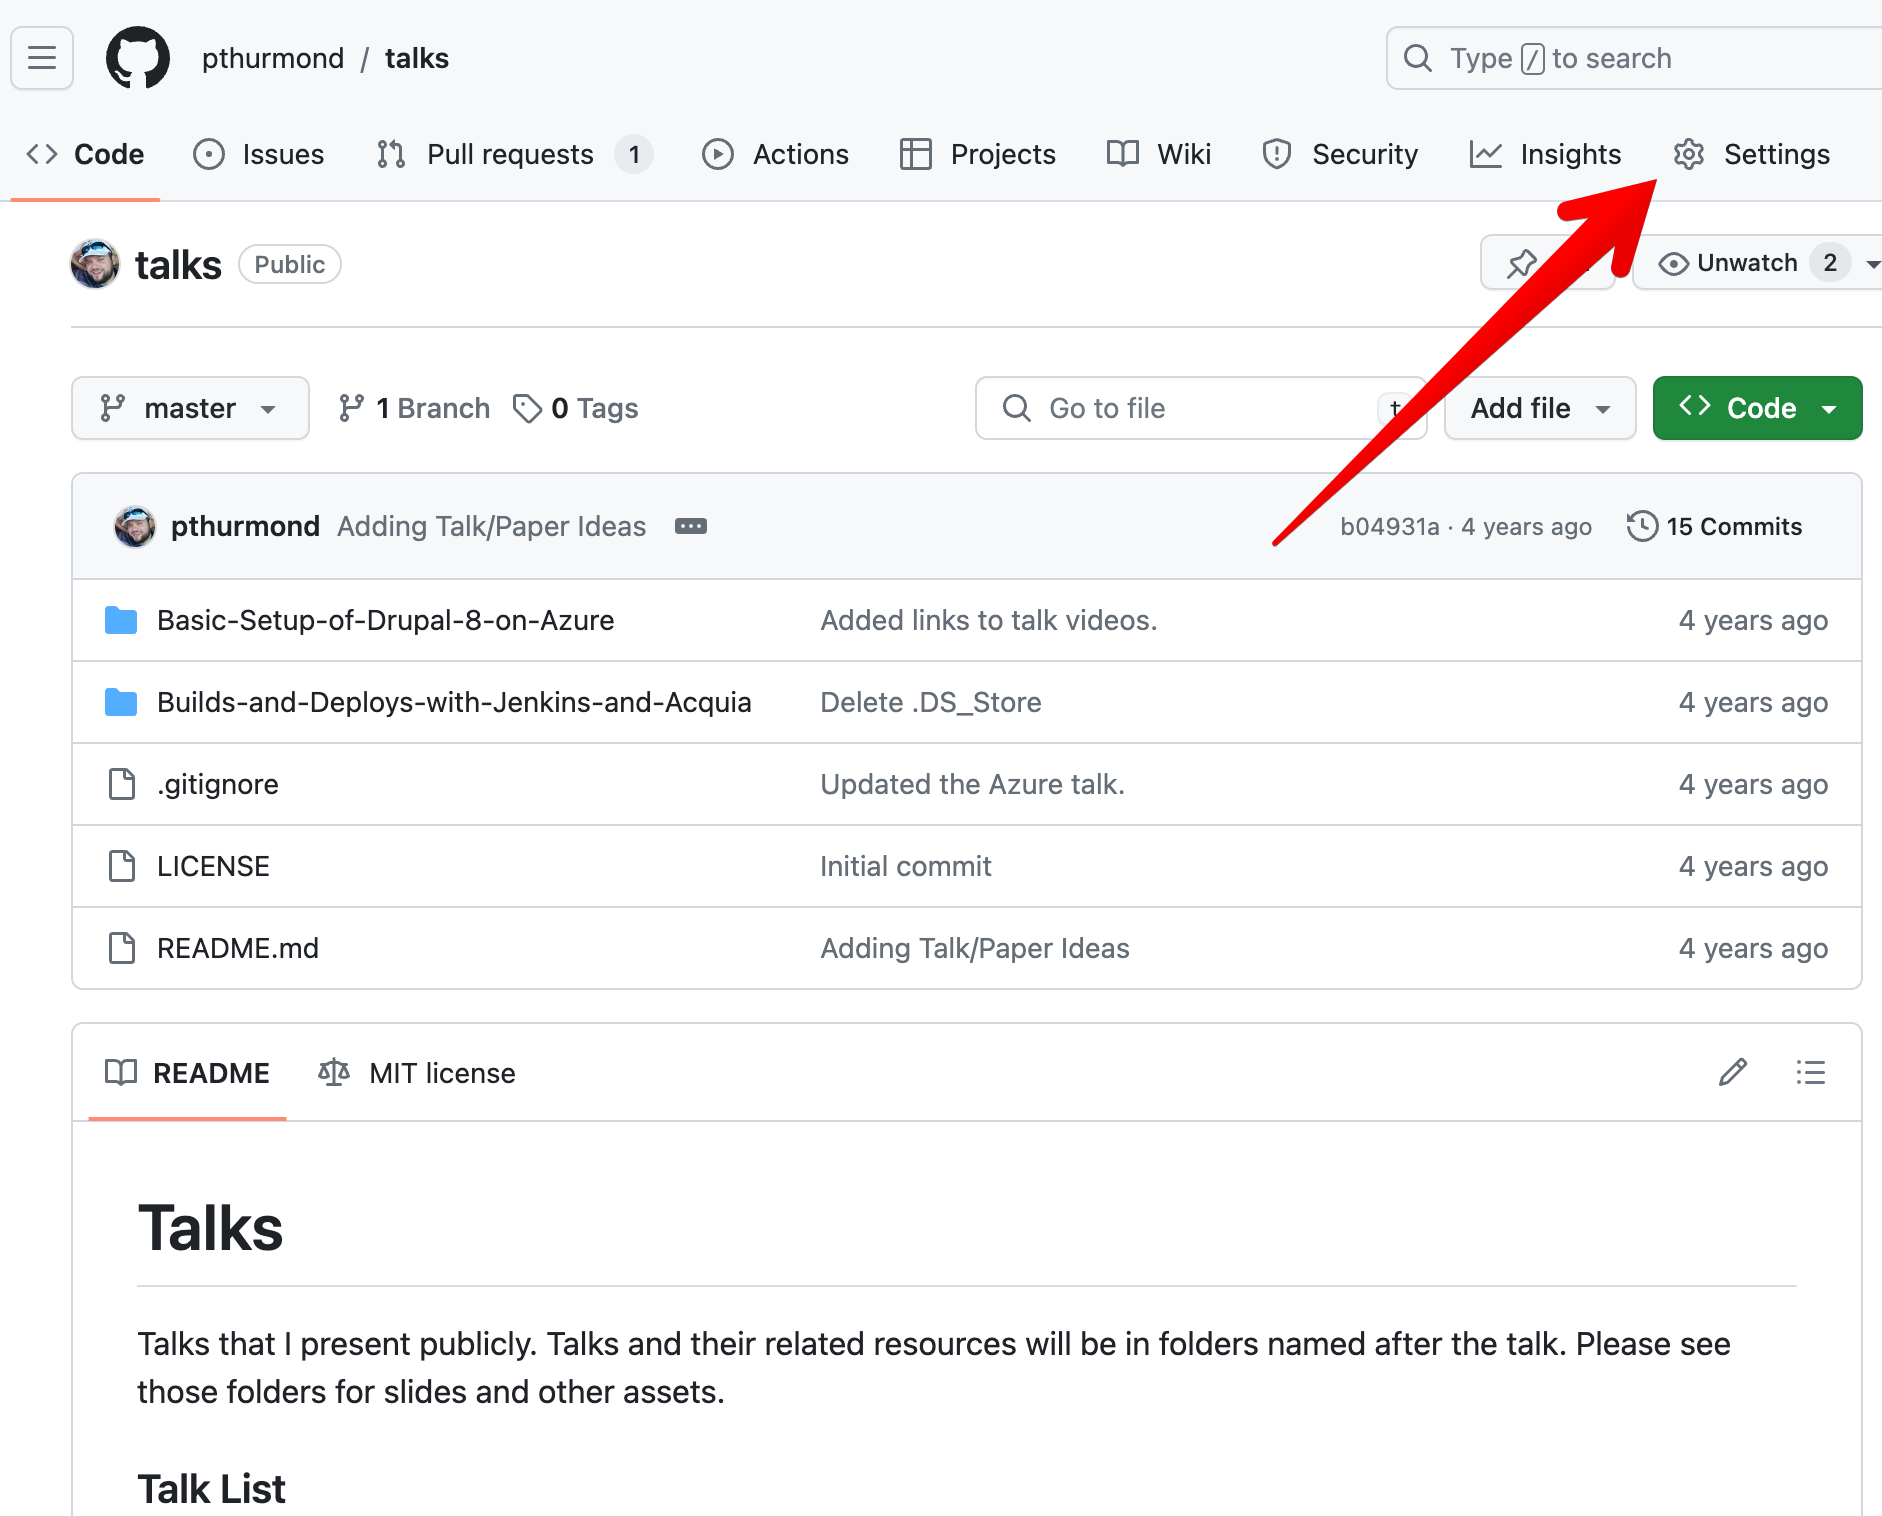
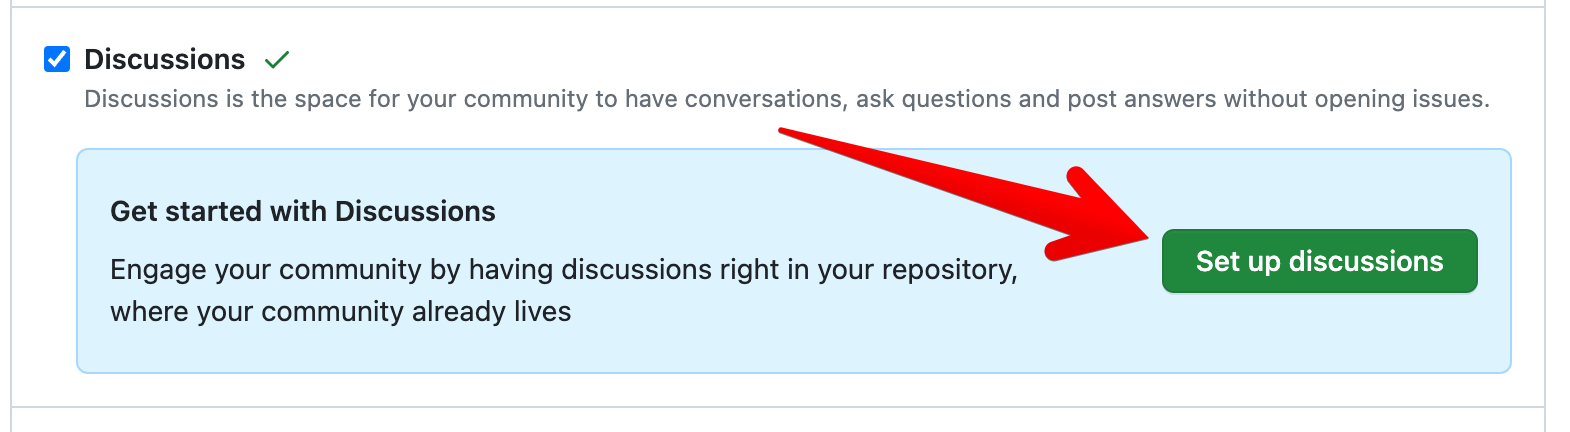
With Giscus available for your repository, we next need to enable Discussions in your target repository. Go to the repository you will be using to store your comments. Then click on “Settings” in the upper right.
Next, scroll down to the “Features” section of the settings and check “Discussions”.

Discussion Setup
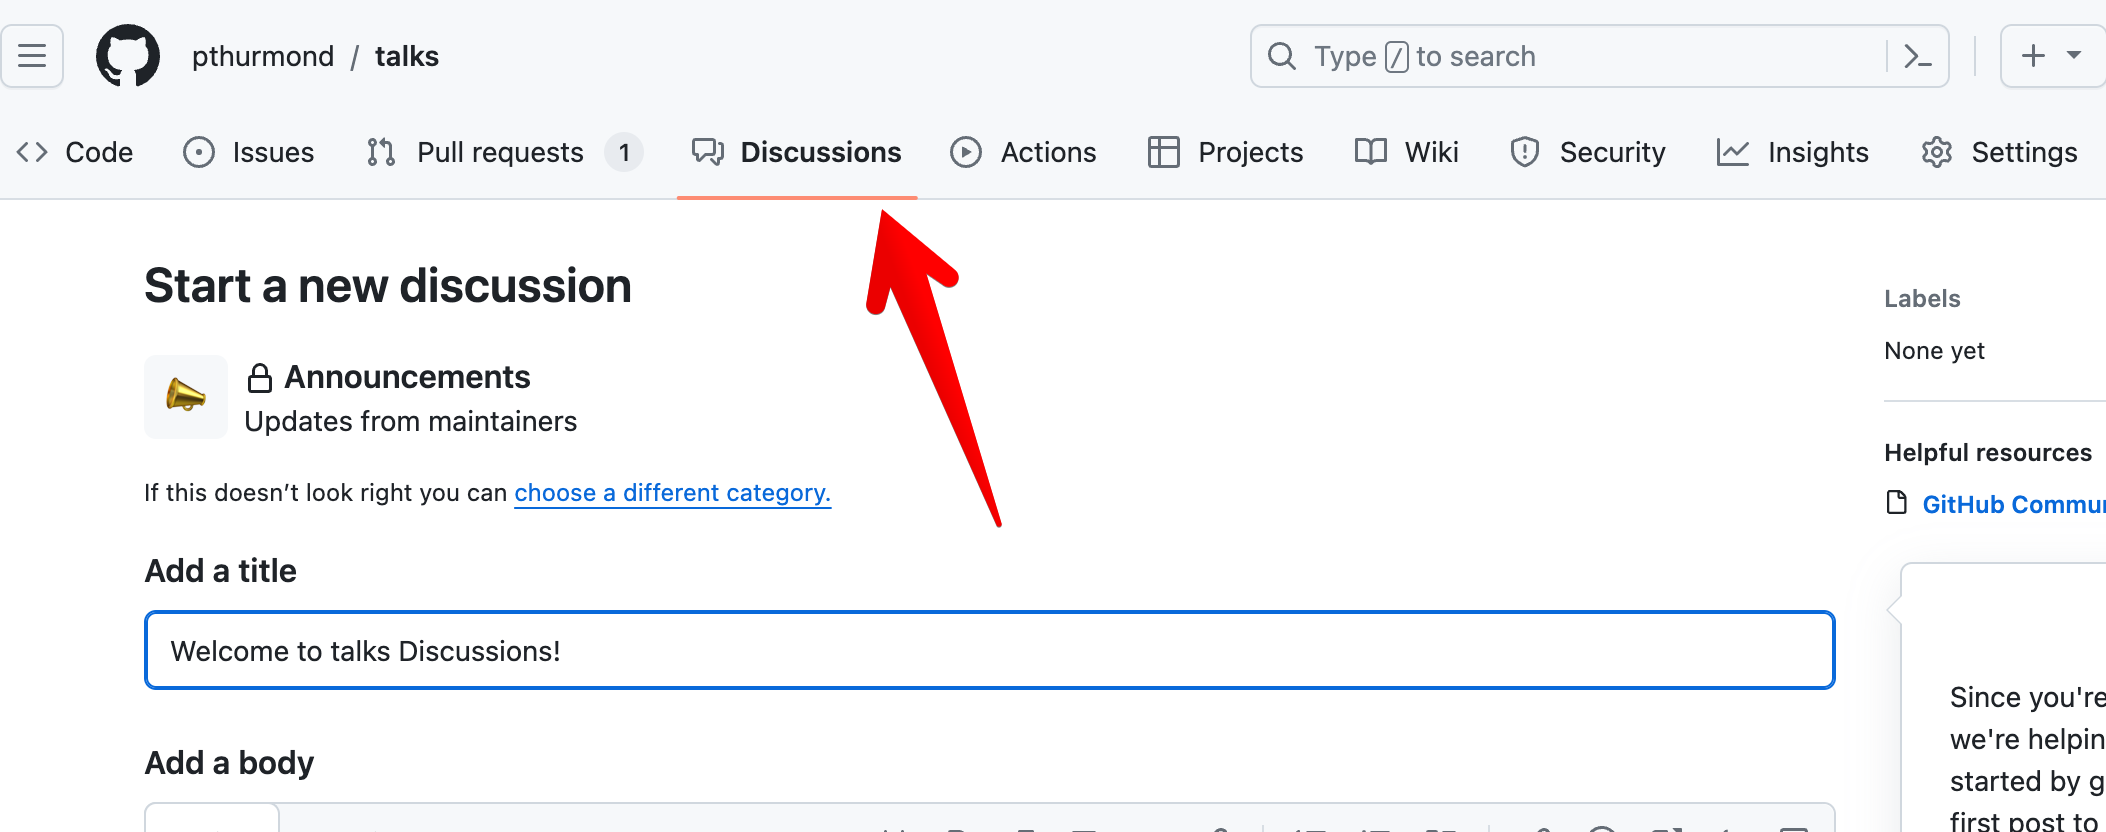
From here, I clicked on “Set up discussions”.
You can fill in the announcement if you like. But when you are done, click on the new tab at the top called “Discussions”.
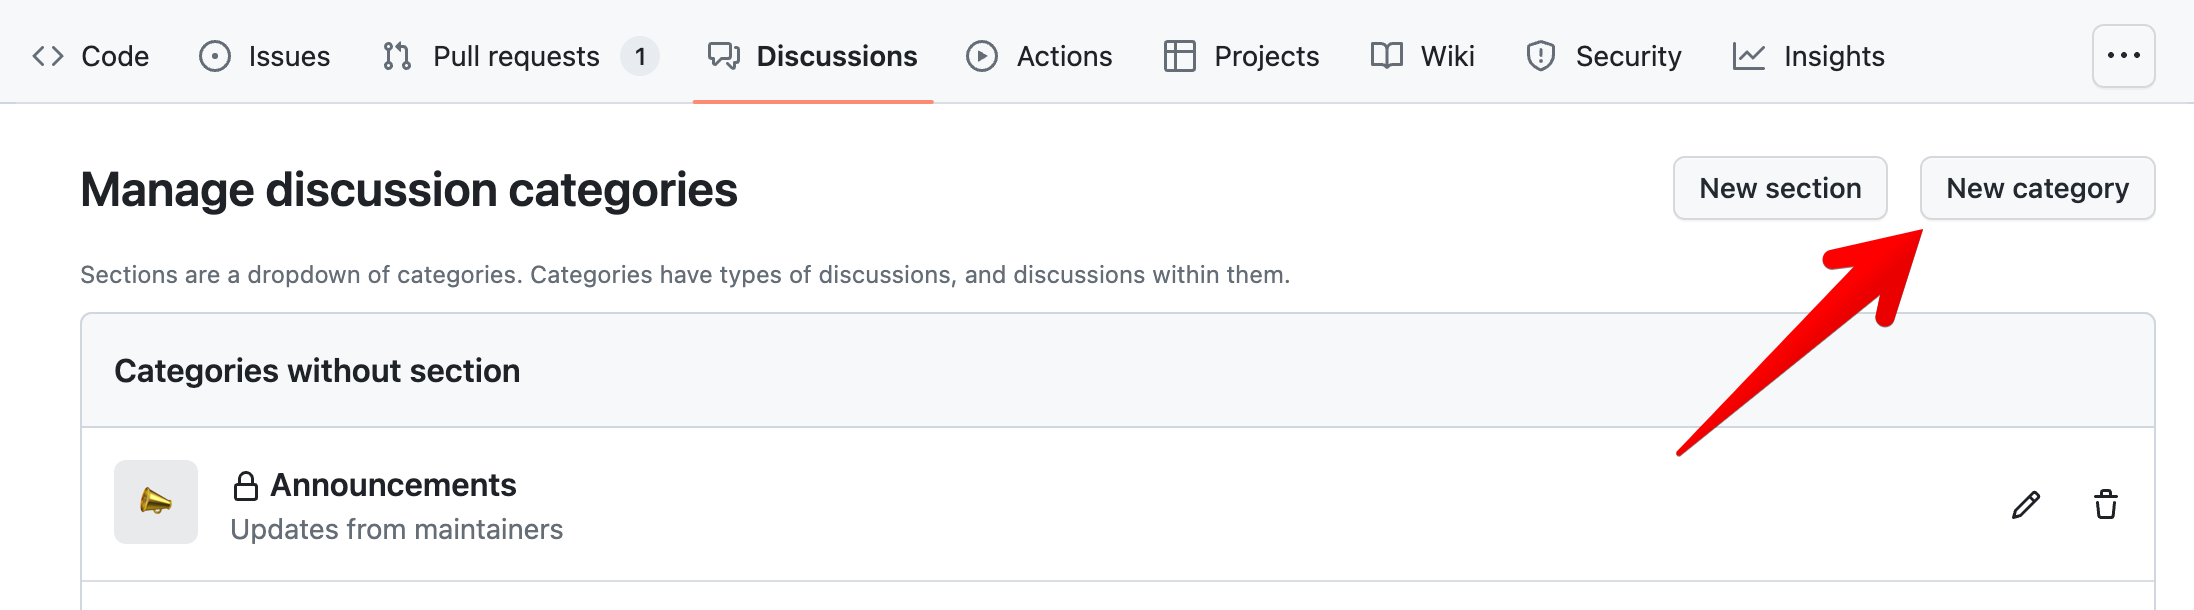
Once there, on the left side you will see “Categories”. Click on the pencil icon.
![]()
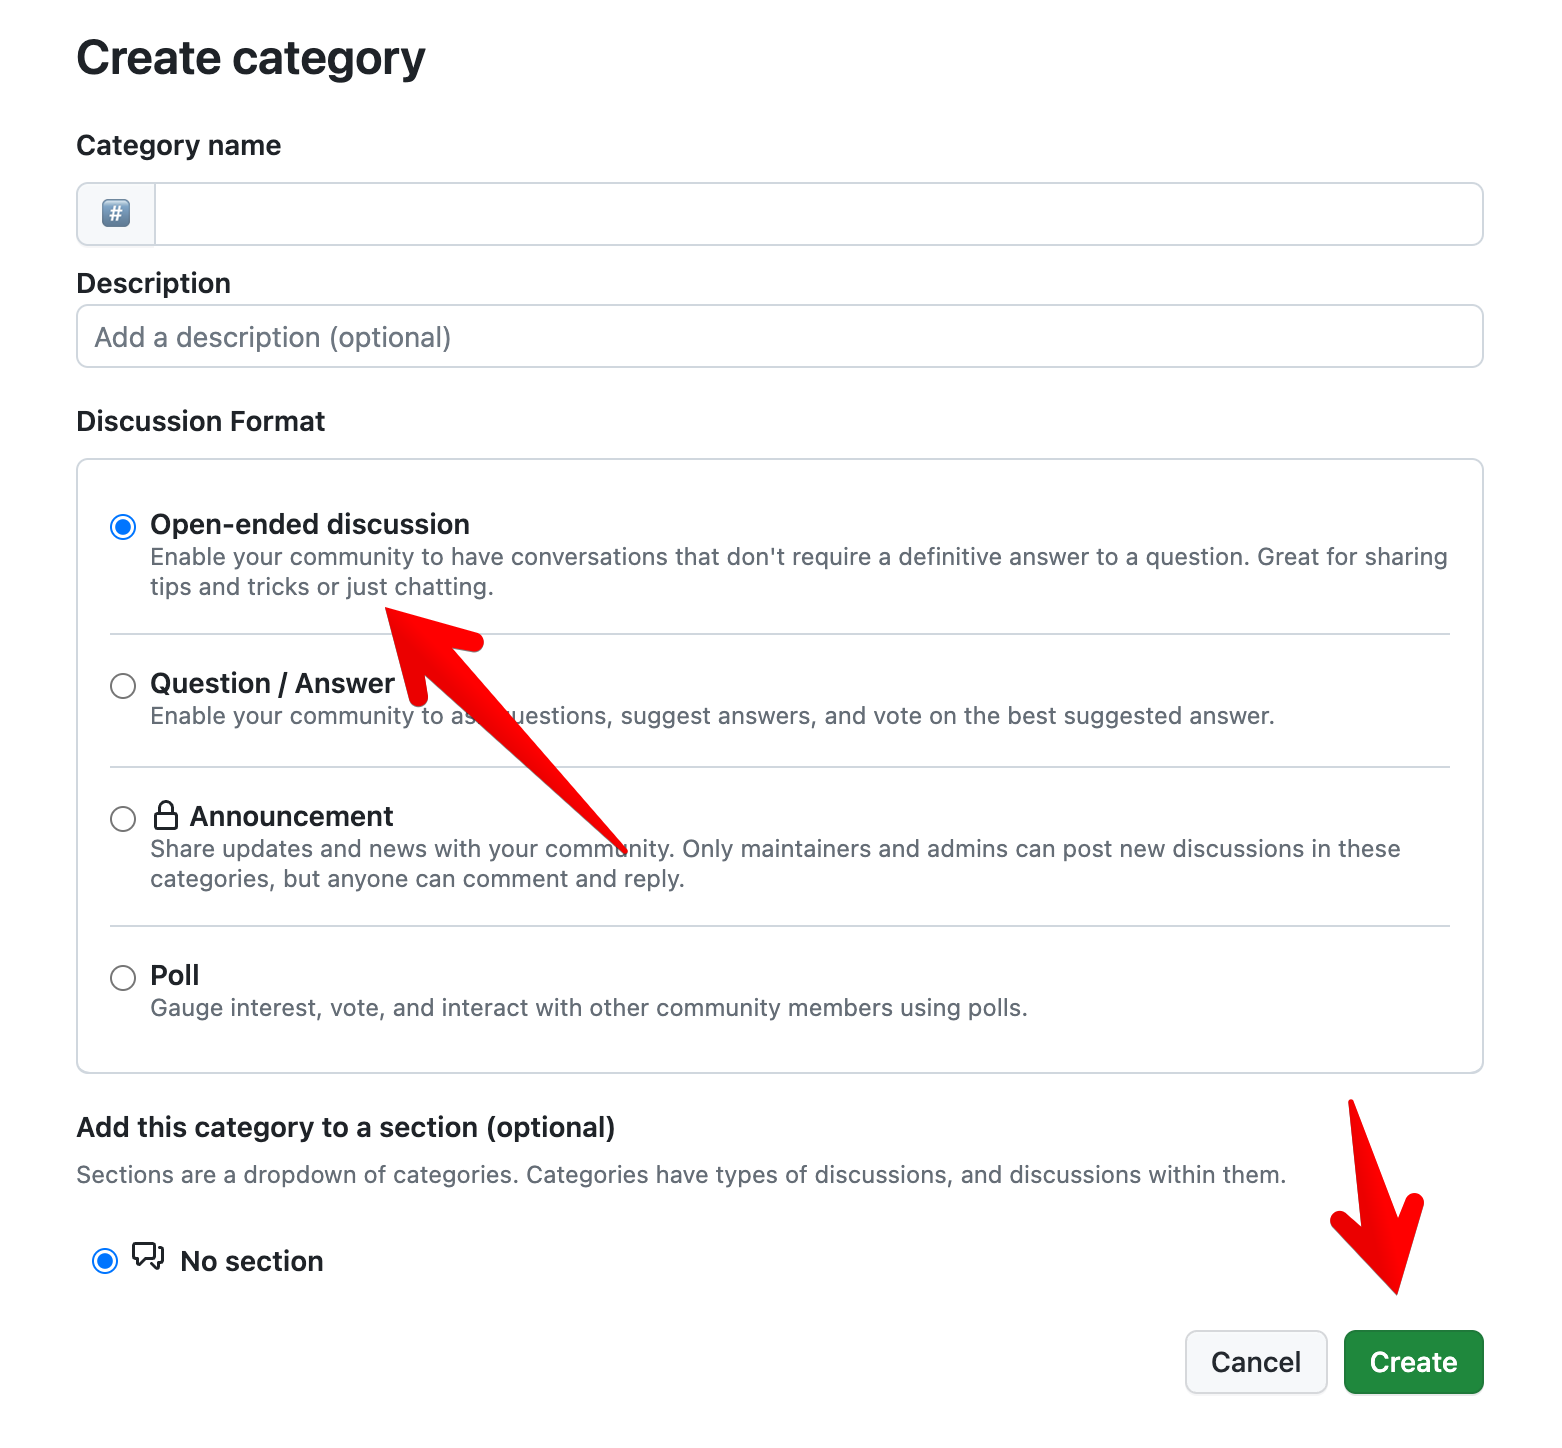
Then add a new category. In my case I called it “Blog Post Comments” to be as exact and literal as possible.
For the format, choose “Open-ended discussion”. Then click create.
Next, we move on to the easy step. Configuring Giscus for your website.
Giscus Configuration
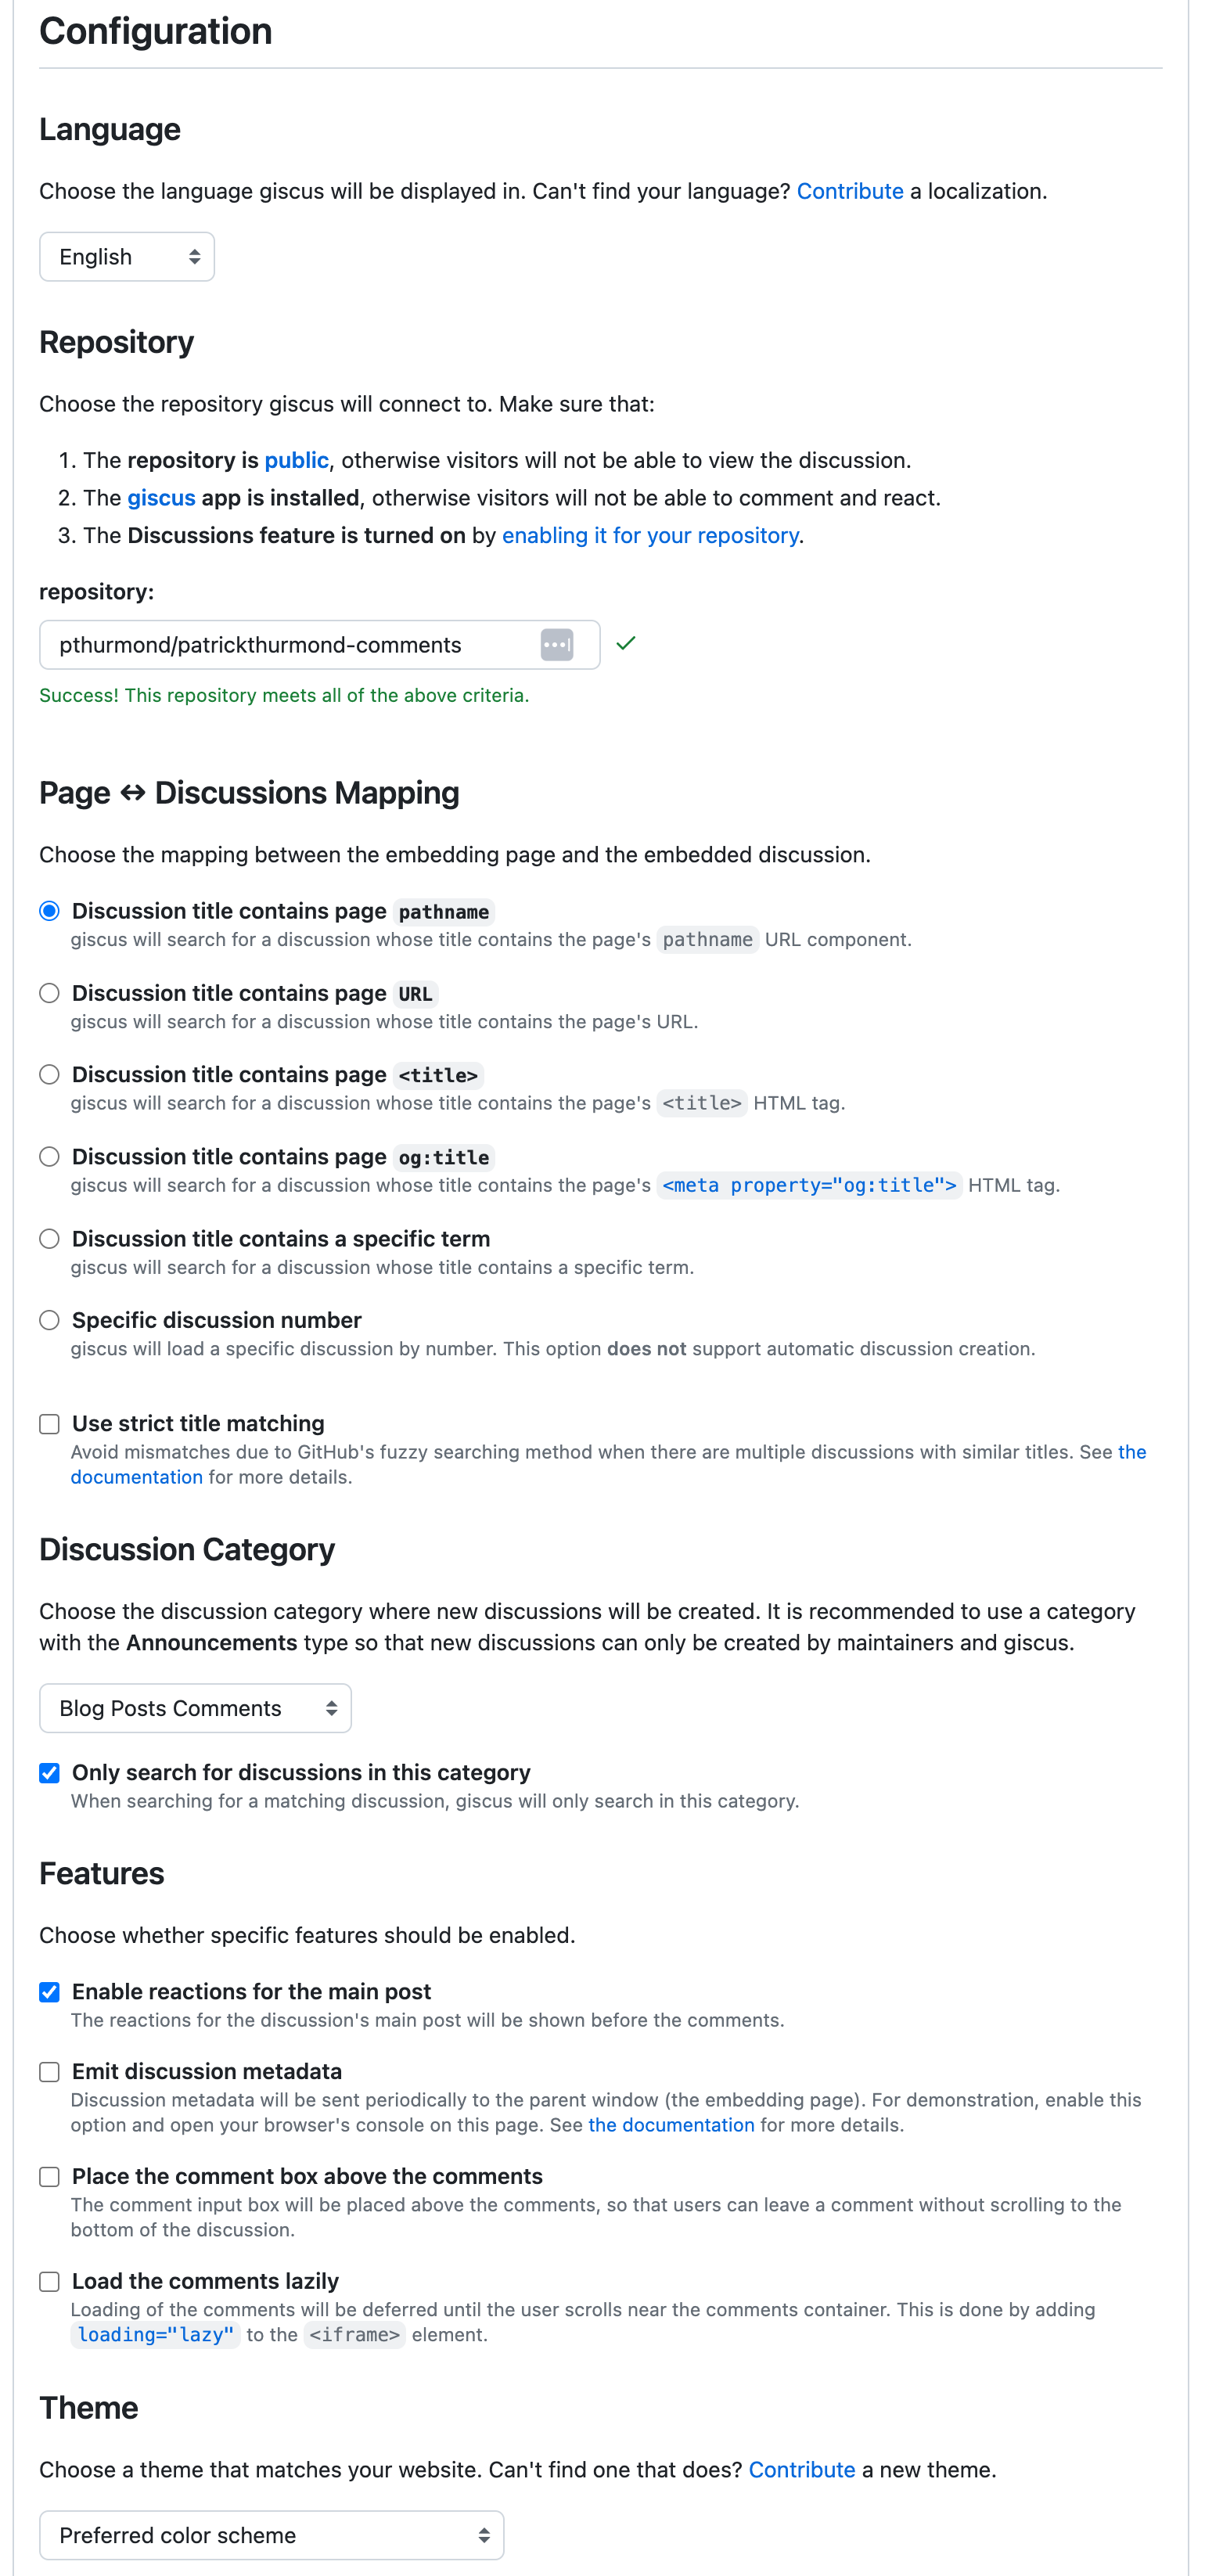
This step is pretty easy. Go to Giscus.app. Now scroll down to the “Configuration” section. Here you need to give it the path to your repo which will have a URI of your Github profile path followed by a slash and then the repo name. For mine this was “pthurmond/patrickthurmond-comments”. If your repo is setup right it will give you a success message.
For the mapping, I selected “Discussion title contains page ‘pathname’“. I did this because I wanted to be able to fully see and test the comments on my local machine as I am building this and I wanted my local output to match what I would see on production. This is very user friendly and portable. I believe it is the best option overall.
Now, select your “Discussion Category”, the one we created above. Leave the “Only search for discussions in this category” box checked. I also checked “Enable reactions for the main post” to provide a bit more interaction. To improve performance, I checked “Load the comments lazily”.
You can play around with different settings if you like. For the theme, I left this on the default.
Adding to Your Website
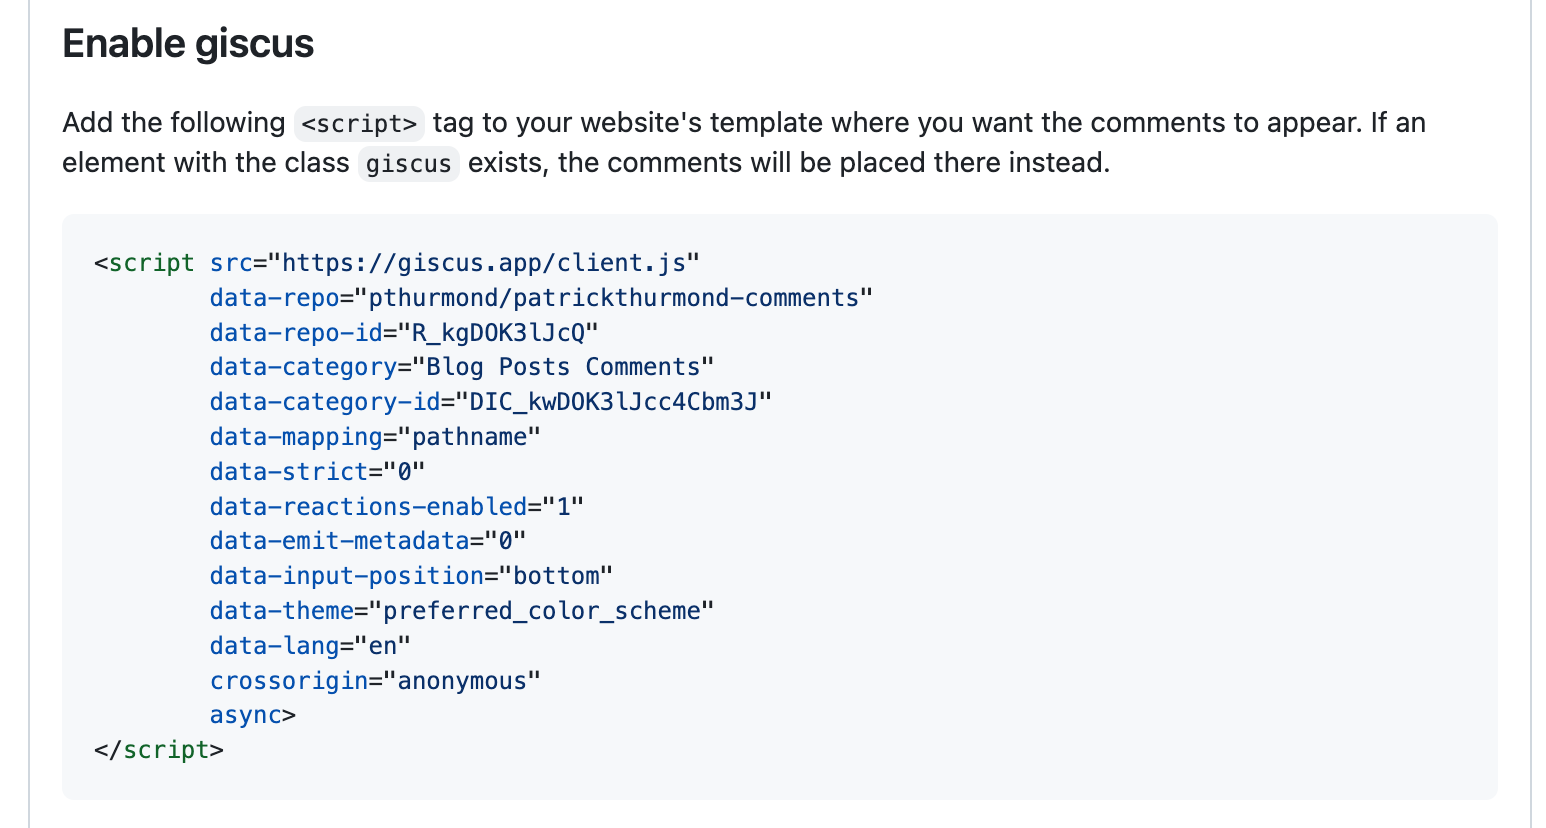
In the previous step, I had you configuring Giscus on https://giscus.app/. Now all you need to do is scroll down to the “Enable giscus” section. Then copy the JavaScript block and past it in your site template where-ever it makes sense to show up where you want it.
Now you just need to place the generated script tag in the appropriate template on your site and build and test. In my case I added it to the blog posts, my talks, and my projects.
In my case I am using Astro JS. Each Astro site can have slightly different paths for some aspects of it. In my case, I created a file in “src/components/widgets” called “Comments.astro”. In it I placed the following code (which should work on any site).
<section class="giscus"></section>

<script src="https://giscus.app/client.js"
        data-repo="pthurmond/patrickthurmond-comments"
        data-repo-id="R_kgDOK3lJcQ"
        data-category="Blog Posts Comments"
        data-category-id="DIC_kwDOK3lJcc4Cbm3J"
        data-mapping="pathname"
        data-strict="0"
        data-reactions-enabled="1"
        data-emit-metadata="0"
        data-input-position="bottom"
        data-theme="preferred_color_scheme"
        data-lang="en"
        data-loading="lazy"
        crossorigin="anonymous"
        async>
</script>
Make sure to keep the “giscus” class in the placeholder. Next, you need to place the placeholder HTML within a container that fits the area you will display it. You can also add further styling either by targeting the “giscus” class or by adding classes your site uses for styling. In my case I use Tailwind and can just drop utility classes on the placeholder or a wrapper.
Conclusion
If you want a simple and free commenting system then I highly recommend using Giscus.